Personalizing Mini Doll Eyes 16mm (Half rounds)
Posted: Mon Jul 11, 2016 11:57 pm
One of my pet peeves with Doll eyes is often how generic they are. So I decided to work on personalizing them. For my 60cm Aiko Doll. (And later some BJD dolls of similar size.)
I am big on faces and eyes, so when I see the Doll eyes out there I get very disappointed. I am sure as this develops I will get better at modding these up.
But there is one thing I know to be true from my experience with Film and Movie Prop Building / Replication. Any prop does not have to look great upon close inspection, but the whole can be amazing over all.
I plan to start off small, and work on to a few more ideas I have for my Dolls, their personalities and photography plans.
First up is My Aiko, named "Neasa LaSwift" I really wanted her to be the blonde beauty. And I wanted eyes that would pop or draw you in.
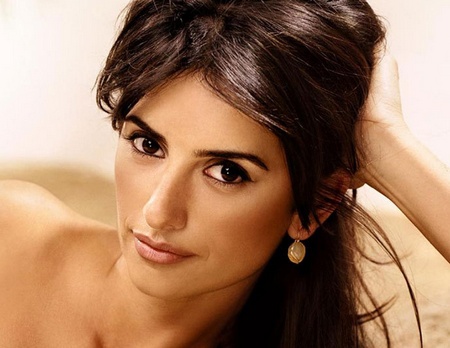
The best example of this on a real person I have seen in a long time, is Mary Jane Johnson....

I ordered in a couple 16mm Half rounds and made a quick go at this. (from an Ebay vendor Named 'hobby.zone')
Blue is not a color I usually work with, so I needed to make a quick stop at the craft store.... I picked up..
A small pack of Brushes, (I only used size 5/0, and a modified cut down brush with 'one' hair on it)
Desert Sky Blue, Blue Cloud, Crisp Blue, Midnight Blue (All in acrylic paint for easy clean up.)
I learned very quickly if you place the lenses in the eye, you have a horrible time getting them out. Which had me do a quick modification to all the 16mm eyes I had ordered...
Drilling a hole in the middle of the base, with a needle, allows for a small hole in the back (Behind the pupil) that you can push the lenses out with)

That made for some quick and painless checks to see if it looked OK with the lenses in. Because the shape actually creates special effects making some areas of paint larger and others smaller.
Layers tend to work well in Prop painting so I started with a thick layer of Desert Sky (the lightest color I had) now I know lots of people would tell you to prime this so the paint held better.
But I chose not to, because....
1) The Paint will be covered and should not come in contact with water or such when done
2) The paint will be easier to remove and redo if needed (Or you make an error)
So this took a couple applications. (I used a Size 2 brush I had laying around)
And used a toothpick to scrape any excess paint off the edges.

The second Layer was applied with the brush with just one hair.
I drew an x in the center of the eye, and then expanded out from there in Blue Cloud (Which is only a couple shades darker)
Remember you do NOT need this to be uniform as two eyes never look identical.

The Third Layer was again applied with the single hair brush.
I drew in from the outer edges towards the center, but I only brushed in to where the edge of the second layer was.
This was in a darker shade called Crisp Blue

The Fourth Layer was done in the same fashion as the (While the Third was still wet, making sure to not completely cover the Crisp Blue layer.
The Final color was much darker than the rest Midnight Blue, and I blended the two layers together.

Any over painting was fixed in the last and final paint layer... by going back to Desert Sky, and brushing outward to open up the center of the eye more, and give depth to all the layers over all.
Edges were again scraped clear by a tooth pick without trouble.
Once this dried I dropped the Lenses in to see how they looked.

When I compared them to the Store bought generics....


It doesn't look too bad, (For a first try)
though it looks like it might be a good version for the Eyes from "The Host"

I tried it in my Aiko Head and got this result....

Over all, pretty happy with them, but I am toying with the idea of pushing that "Midnight Blue" back with some "Blue Cloud" to see how that looks.... Just to open it up a little more for the effect of having the light blue eyes, only bordered in dark blue for that piercing look.
I am big on faces and eyes, so when I see the Doll eyes out there I get very disappointed. I am sure as this develops I will get better at modding these up.
But there is one thing I know to be true from my experience with Film and Movie Prop Building / Replication. Any prop does not have to look great upon close inspection, but the whole can be amazing over all.
I plan to start off small, and work on to a few more ideas I have for my Dolls, their personalities and photography plans.
First up is My Aiko, named "Neasa LaSwift" I really wanted her to be the blonde beauty. And I wanted eyes that would pop or draw you in.
The best example of this on a real person I have seen in a long time, is Mary Jane Johnson....
I ordered in a couple 16mm Half rounds and made a quick go at this. (from an Ebay vendor Named 'hobby.zone')
Blue is not a color I usually work with, so I needed to make a quick stop at the craft store.... I picked up..
A small pack of Brushes, (I only used size 5/0, and a modified cut down brush with 'one' hair on it)
Desert Sky Blue, Blue Cloud, Crisp Blue, Midnight Blue (All in acrylic paint for easy clean up.)
I learned very quickly if you place the lenses in the eye, you have a horrible time getting them out. Which had me do a quick modification to all the 16mm eyes I had ordered...
Drilling a hole in the middle of the base, with a needle, allows for a small hole in the back (Behind the pupil) that you can push the lenses out with)
That made for some quick and painless checks to see if it looked OK with the lenses in. Because the shape actually creates special effects making some areas of paint larger and others smaller.
Layers tend to work well in Prop painting so I started with a thick layer of Desert Sky (the lightest color I had) now I know lots of people would tell you to prime this so the paint held better.
But I chose not to, because....
1) The Paint will be covered and should not come in contact with water or such when done
2) The paint will be easier to remove and redo if needed (Or you make an error)
So this took a couple applications. (I used a Size 2 brush I had laying around)
And used a toothpick to scrape any excess paint off the edges.
The second Layer was applied with the brush with just one hair.
I drew an x in the center of the eye, and then expanded out from there in Blue Cloud (Which is only a couple shades darker)
Remember you do NOT need this to be uniform as two eyes never look identical.
The Third Layer was again applied with the single hair brush.
I drew in from the outer edges towards the center, but I only brushed in to where the edge of the second layer was.
This was in a darker shade called Crisp Blue
The Fourth Layer was done in the same fashion as the (While the Third was still wet, making sure to not completely cover the Crisp Blue layer.
The Final color was much darker than the rest Midnight Blue, and I blended the two layers together.
Any over painting was fixed in the last and final paint layer... by going back to Desert Sky, and brushing outward to open up the center of the eye more, and give depth to all the layers over all.
Edges were again scraped clear by a tooth pick without trouble.
Once this dried I dropped the Lenses in to see how they looked.
When I compared them to the Store bought generics....
It doesn't look too bad, (For a first try)
though it looks like it might be a good version for the Eyes from "The Host"
I tried it in my Aiko Head and got this result....
Over all, pretty happy with them, but I am toying with the idea of pushing that "Midnight Blue" back with some "Blue Cloud" to see how that looks.... Just to open it up a little more for the effect of having the light blue eyes, only bordered in dark blue for that piercing look.