sactojoe wrote: ↑Wed Jun 22, 2022 2:19 pm
Thanks Muesky! Big guys like Klaus are the reason why I'm getting in to this. The bigger the better!

It's a tough engineering problem to make dolls this big and have them be moveable and not fall apart under their own weight. I'm so excited that I can see a path forward.
I excited for you that all the pieces of your doll are coming together! You gotta post pics of your skeleton. I've been researching parts to assemble my own and any info helps! I ordered a 12" stop motion armature to look at the mechanics of how it moves. It seems super fiddly and probably won't work with a doll where it is cast in silicone. For that I would need a "set it and forget it" application. I switched out the rods for longer ones. Here it is next to my 18" model:
IMG20220622101835.jpg
The seams on dolls can be problematic. I think I remember that the first Realdolls had visible wrist seams at the start. It's a learning process. To cover up the seams on Troy I used stacked bracelets on one wrist and a leather cuff on the other. It's good that he's not afraid of a little jewelry! The wrist ankle openings seem pretty tight on the body suit, so the seams might be pretty minimal if you get the overall shape right.
I'm really interested in the hands you have on order too. And in BLACK! It's going to be so cool.
You'll definitely want some new clothes for your guy! It's a struggle for me to keep my guys fully dressed though!
Muscle Dad Wade says Hi! He's been helping me watch the prints to make sure everything runs smoothly. His presence can be a little distracting!
IMG20220621122608.jpg
Okay so does Big Daddy Wade just sit around with his willy out? Cuz I am not sure I have seen a picture of him without his penis out.. But hey, if you got it like him, might as well flaunt it. Right?

Well I am quickly getting back to myself, so I have really channeled some serious squirrel energy..

I went to take pictures of the doll skeleton in the livingroom and decided I could paint the wall, since I moved the bookshelf that was there.. This reminded me that I wanted to move a cabinet I have in the bedroom to where the bookshelf was. So I went to clear out the cabinet and get it ready to move.. Which reminded me I had clothes that need to be folded in the dryer.. After doing that, I needed a drink and decided to do the dishes. Then I remembered I needed to take pictures of the doll skeleton for you, but the wall wasn't dry so I decided to just make do at the studio door, but needed to put the arms on first, so had to go find the tools to do that..
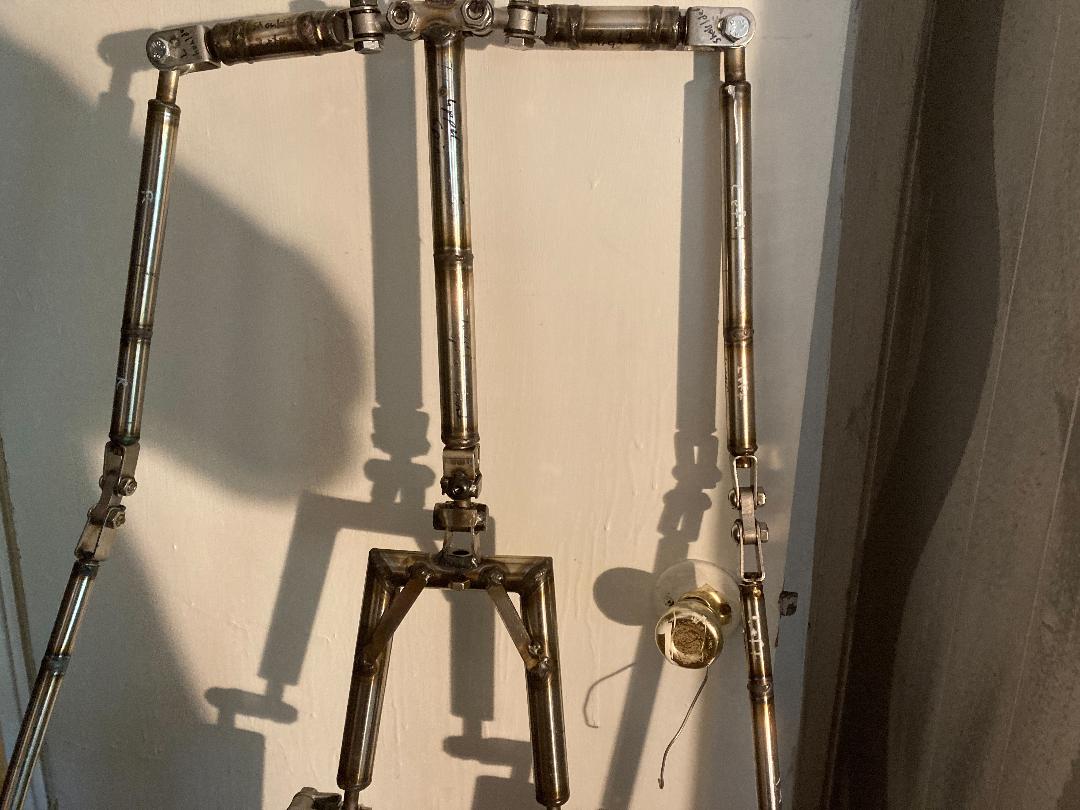
Finally here is the doll skeleton..

- Full skeleton.jpg (119.51 KiB) Viewed 620 times
The skeleton is about 5'8" without the head or the foot bolts so it will be around 6'1" when done.

- Shoulders and neck.jpg (84.36 KiB) Viewed 620 times
So I had to widen the shoulders a lot and I wanted the shrugging shoulders and the neck attachment. That came off the 148cm skeleton. Ended up cutting two 2 1/2" pieces to widen the shoulders. The arms were not long enough on either skeleton and I wanted the elbow joints from the 148cm doll, as it has guides to keep the arms from hyper extending backwards. So I cut the elbow joints out with extra length and attached the pieces to the upper arm and wrist of the 170cm frame.
- Torso.jpg (105.13 KiB) Viewed 620 times
So I really lucked up on this one.. I cut the 148cm skeleton where the spine meets the hip tubing and the 170cm where the spine meet the shoulders and voila! it was the perfect length for the torso..

- hips and legs.jpg (97.17 KiB) Viewed 620 times
Honestly I feel like the hips and legs for these skeletons are made for a variety size dolls.. Fortunately the whole lower half was absolutely correctly proportioned for the body suit.. Which was a darn good thing as this doll was really damaged during shipping and the thigh pipes were bent all to crap and that would have been an absolute mess trying to weld anything on it..
When I get the suit out again I will take measurements of the exact size of the skeleton.. That way we have the size for the Smitzen suits if anyone wants to order a doll skeleton..
FYI about having a skeleton made here in the states.. So I priced out stainless steel tubing.. For these dolls you need 1/2, 3/4, 1" and 2 1/2 stainless steel tubing and let me tell you that crap isn't cheap.. Just the pipe alone will run you around $300-400. Then all the bolts, connectors, washers and U brackets is another $50. To have the full thing welded even with a discount is going to cost you around $300-400.. That doesn't count the articulated hands which until I get the set in I have just some theoretical ideas on how to make. Honestly unless I can source the materials cheaper and learn to weld, I am just going to order the skeletons from WM.. I am going to try to contact the factory directly and see if I can get them a bit cheaper then going through a vendor.. But even going through a vendor would be cheaper and save me a lot of time, which in my case I never have enough of..