
Nothing new will happen if people rationalize everything to "it's too hard / not financially profitable"
Very negative attitude.
The first casts/molds were decent, or even good, IMO.

DIY stuff
-
3dprinteddoll
- Active Member

- Posts: 140
- Joined: Tue Dec 22, 2020 6:47 am
- Location: EU
- Contact:
Re: DIY stuff
tiaria wrote: The first casts/molds were decent, or even good, IMO.
Thanks. I haven't abandoned the idea, just stopped publishing on some minor progress. I'll post some new stuff when it will be something relevant, like some major step worth displaying in public.
Re: DIY stuff
Thanks for posting your progress, it was really an interesting topic to read and i can't wait for more.
-
ADHERAQ777

- Senior Member

- Posts: 486
- Joined: Fri Mar 13, 2009 12:00 am
- Location: France
- Contact:
Re: DIY stuff
Yea I am happy you follow advice....3dprinteddoll wrote:tiaria wrote: The first casts/molds were decent, or even good, IMO.
Thanks. I haven't abandoned the idea, just stopped publishing on some minor progress. I'll post some new stuff when it will be something relevant, like some major step worth displaying in public.
Take Time, need more years for make ONE think good.
Ask question about mechanical, and step by step, advance. But no want make ALL in ONE DAY, just you will fall...
WMDOLLS 140 2018 TPE
Starpery RONG TPE 2021
Teddy Babe 2009 Jessica
4Woods Elina 2011
Doll House 168
Dolls Repair TV : http://www.youtube.com/channel/UCCiI8IS ... /playlists
Dolls Albums : http://www.dollalbum.com/dollgallery/in ... ?cat=11576
Print3D : https://cults3d.com/fr/utilisateurs/Anarkia777/
Artiste 3D : https://www.deviantart.com/anarkia333/gallery
-
3dprinteddoll
- Active Member
- Posts: 140
- Joined: Tue Dec 22, 2020 6:47 am
- Location: EU
- Contact:
Re: DIY stuff
@sefrgdsefrgd wrote:Thanks for posting your progress, it was really an interesting topic to read and i can't wait for more.
Thanks ! If you're interested in how other people do this, I recommend you watching youtube videos and tutorials of silicone artists, they make foots, body parts and many interesting objects similar to what I have shown. Love dolls are rare, being cumbersome, and requiring lots of silicone, but making them is not very different in principle.
I have switched the channel where I post my detailed progress, because in the long run, I am doing this blog thing, mostly for myself, to not forget what I have learned, and I've noticed very few people must be playing here with silicone art too, like casting, artisitc painting and so on, I haven't noticed anyone, but maybe if I would search across the whole corner some few examples could be found in the past, I don't know. I've met some people with mechanical background in the thread, but I am not making skeleton anytime soon, not area of my focus now, so posting here won't add much to my progress for a while. And some members could even try to derail, aparently having no better thing to do. But I will show some ready stuff later.
-
3dprinteddoll
- Active Member
- Posts: 140
- Joined: Tue Dec 22, 2020 6:47 am
- Location: EU
- Contact:
Re: DIY stuff
Progress while somewhat slower than I expected is there. This year is full of various experiments related to mold making:
-
3dprinteddoll
- Active Member
- Posts: 140
- Joined: Tue Dec 22, 2020 6:47 am
- Location: EU
- Contact:
Re: DIY stuff
Early concept for the mold positive:
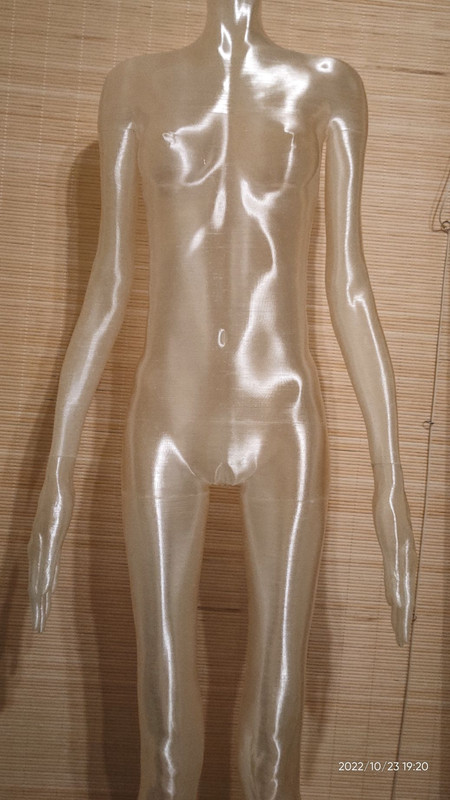
It is 150 cm without head. With head, it will be about 168 cm.
This won't be actually used for mold making, it was printed to evaluate the feasibility of making a (do-it-yourself) mold positive, cheap and fast*, and to evaluate what are the challenges (like smoothing out/masking seams, precision assembling and gluing individual parts, not to mention 3d printing material evaluations, 3D part design and print configuration).
What's next... The next mold positive prototype will be properly posed, with slightly bend legs and arms. Most likely it will be used for making the very first doll mold. And it will have improvements, some issues related to parts assembly resolved first, I don't want to see any defects, when I will pour those expensive gallons of silicone into it one day.
In meantime I'm about to start working on the skeleton, and finally there's a chance I'll make the negative, the actual doll mold, sometime next year. Maybe then the first doll cast will follow, with the backbone and all the cool stuff inside.
I am also now making some first simple experimental silicone sex toys, to develop some comfortable lady parts, which are of course very important in this kind of applied art efforts
* - to print 13 parts (without head), it took me about 2 weeks (4-12h of printing a day), not counting the longer breaks I had in the actual process.
-
Kaori Kusanagi

- Senior Member
- Posts: 212
- Joined: Tue Sep 22, 2020 7:18 pm
- Contact:
Re: DIY stuff
Looks good.
I might've missed it among the various "off topic" divergences in the thread, but what will your demolding process be, with a mold built this way?
I'm curious because I make platsil stuff, but I usually use multipart plaster/etc molds that fit together as close as I can manage, with a fill hole at the "top" somewhere, then end up having to trim the seam lines and fill hole area (or hide them in the moldmaking process to areas where they won't be noticed, like where there will be sharp edges, corners, etc).
It would be a lot easier (well, faster) for me to make molds for complicated things if I could 3D print them (even in pieces and assemble them), seeing your process of printing and assembling and demolding / cleanup could help me figure out mine.
-
3dprinteddoll
- Active Member
- Posts: 140
- Joined: Tue Dec 22, 2020 6:47 am
- Location: EU
- Contact:
Re: DIY stuff
@Kaori
Currently the idea is to make silicone mold (negative) around such print, within some more stiff container. Months ago I was considering direct 3d printing of the negative (mold) and then pouring silicone into it and while that would be fast, I've abandoned the idea due to difficulty of evenly smoothing out (post-processing) the inside walls of such 3d printed mold, especially when you have something like hand, fingers, tight tunnels (but I still use this method for simpler/smaller toys, which have no inaccessible geometry).
When I've mentioned seams in previous post, I was actually thinking about defects, marks or lines in places where the (positive) parts were combined/glued together, so I'll edit the post to clarify. More broadly this would also include print layers. But I wasn't talking about the 2-part mold seams of the negative, I'm not there yet. I know that at some point I will have to pull things out and do a cut, and the seam might be unavoidable. While in theory it could be possible, to pull the positive out by melting or disolving it, and I was considering this option for a while, it would still be very difficult, to put and position the solid skeleton inside it, so I will probably resort to cutting the mold into 2 pieces, and then later on hoping I that I've fit that 2 part-mold properly. And finally I'll be shaving/trimming those final seams on the cast, just like you said you do.
Otherwise I would had to insanely complicate stuff, to put in and pull out stuff from the mold, without any cutting, eg. through the neck or some hole on top of the head, or merging the metal skeleton with soluble parts, too much of an effort and risk, to get rid of the seam marks, at the mold making step. And I would have to cut the mold at the final step anyway, so it couldn't be reused in the same way over again.
-
3dprinteddoll
- Active Member
- Posts: 140
- Joined: Tue Dec 22, 2020 6:47 am
- Location: EU
- Contact:
Re: DIY stuff
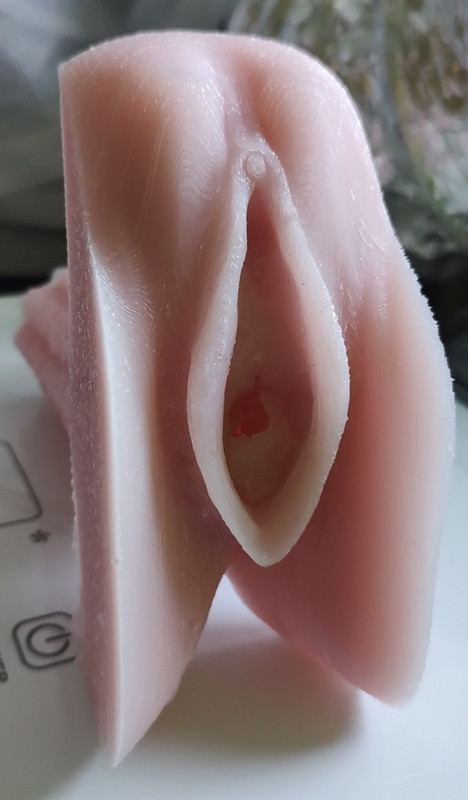
Today I made a sex tube  that is masturbator. This is my second attempt. First one failed in terms of usefulness, because the silicone, was too hard and the entrance too dense/tight. I've tried to fix this issues by changing the silicone mixture and redesigning the vagina's entrance part, and here is the second attempt, photo below:
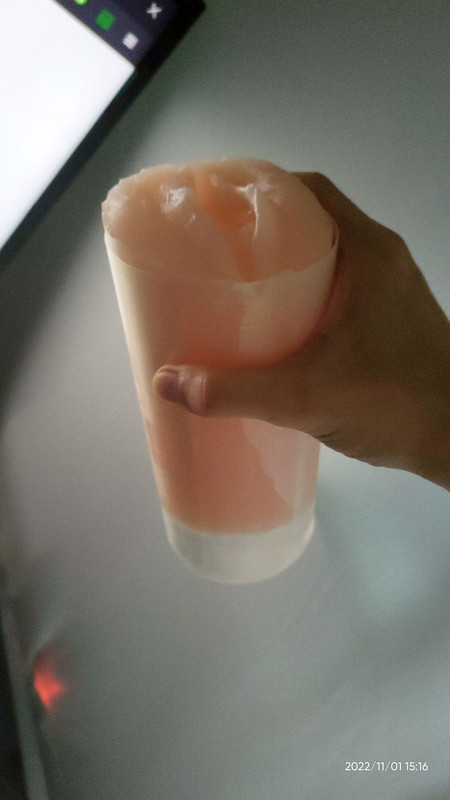
Learning how to make a good masturbator is quite important, if anyone wants to build a doll. It helps to develop the best vagina entrance design and find most comfortable silicone mixture, that still holds. Later the gained experience is very useful when designing comfortable and realistic doll's bottom.
I've just made some live testing it is very comfortable, there is still a room for slight tweaks, but this item will definitely serve me for some time.
The next version will be with USB sock warmer embedded inside silicone for improved sensations and faster drying.
Learning how to make a good masturbator is quite important, if anyone wants to build a doll. It helps to develop the best vagina entrance design and find most comfortable silicone mixture, that still holds. Later the gained experience is very useful when designing comfortable and realistic doll's bottom.
I've just made some live testing
The next version will be with USB sock warmer embedded inside silicone for improved sensations and faster drying.
-
3dprinteddoll
- Active Member
- Posts: 140
- Joined: Tue Dec 22, 2020 6:47 am
- Location: EU
- Contact:
Re: DIY stuff
Here I share the 3D printable artificial vagina mold (walls only) that I designed:
https://cults3d.com/en/3d-model/naughti ... agina-mold
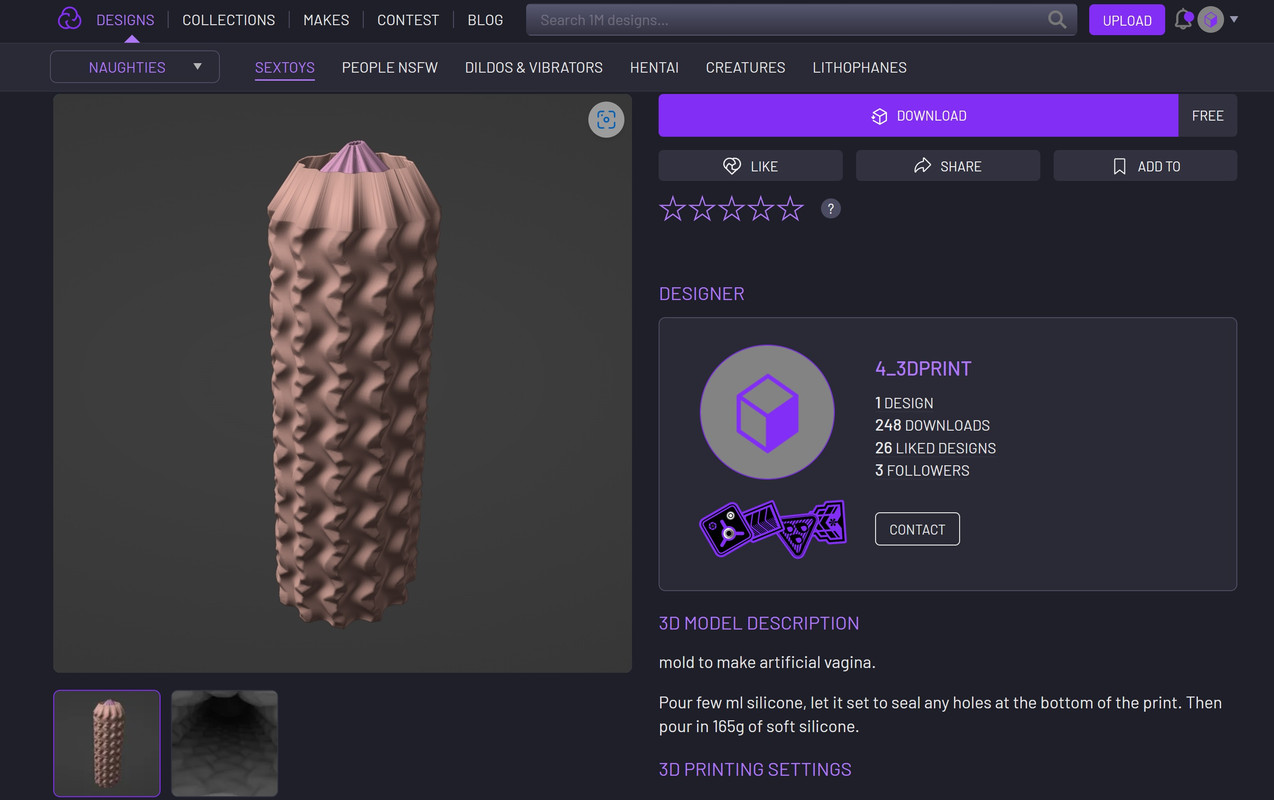
silicone required: ~165g
Unlike previous one, this one has thin (about 1 cm) walls and wavey interior pattern for optimal stimulation, this is vagina only without frontal parts labia majora.
The entrance is thin (more natural, hymen-like, it ruptures after first use, still obscuring vaginal interior). It could serve as internal part of some larger toy.
https://cults3d.com/en/3d-model/naughti ... agina-mold
silicone required: ~165g
Unlike previous one, this one has thin (about 1 cm) walls and wavey interior pattern for optimal stimulation, this is vagina only without frontal parts labia majora.
The entrance is thin (more natural, hymen-like, it ruptures after first use, still obscuring vaginal interior). It could serve as internal part of some larger toy.
-
3dprinteddoll
- Active Member
- Posts: 140
- Joined: Tue Dec 22, 2020 6:47 am
- Location: EU
- Contact:
Re: DIY stuff
In next step I've casted the vagina, and then inserted it into second the mold (exterior part), then poured in silicone into the mold:

Penetration test passed
Penetration test passed


